DUE: March 8, 2021 (11:59pm, EST)
5% | 50 Points
Note: We can also discuss this exercise during our individual text-chat meetings for Mandatory Conference Period #1 (Week 6: February 21 to February 27). You’re going to learn how to add a little Hyper Text Mark-up Language (HTML). The reason for this part of the exercise: this is your opportunity to get behind the Dashboard (which is behind the website), to understand (just a little bit) of how digital expressions are, in fact, digital; also, it is good to have a sense of what some of the coding is like, to hopefully inspire you to learn that it isn’t hard to use, and to appreciate just how much more control knowing HTML gives you. This particular HTML is going to allow your viewer to “jump” to a particular part of the page, once that part has been identified. To see an example of this, visit Lesson 2: Content Curation I — The Technology and Safety of Digital Expression.
- Make sure that you are using the Classic Editor plugin: go to Plugins, click on Installed Plugins, click on the Activate button for Classic Editor. (You can deactivate it again, once you have saved your page.)
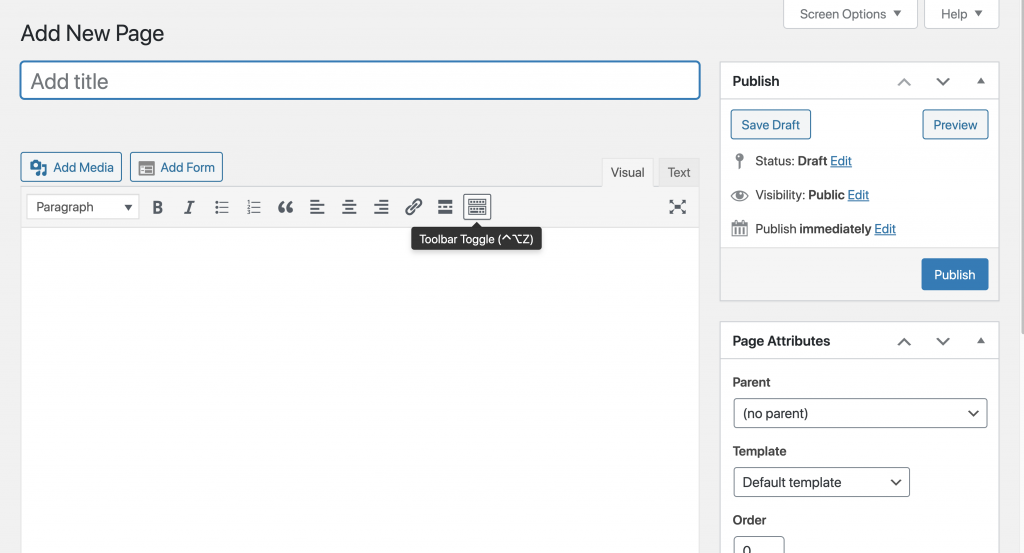
- Create a new page. It should look something like this when you open it:

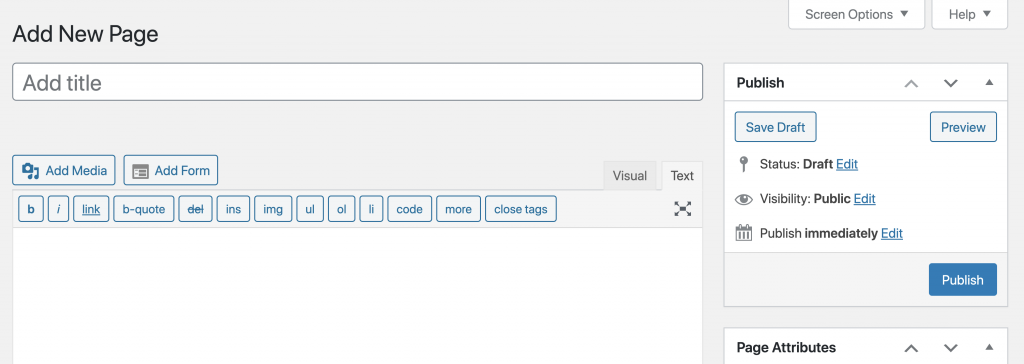
- Click on the “Text” tab on the page (right side):

- When you do that, it will look like this:

- Now you are ready to type a little HTML!
- First, let’s establish an identifying marker for returning to the top of your page. At the top of the page, add the following HTML code: <p id=”top”>TOP</p> (You will add the code linking to this marker after some of the next steps are first completed; see below.)
- Hit your return/enter key once or twice.
- Now, let’s create a few links to further down the page. You’re going to create at least two parts. To make those two links, you’re going to need some information. Scroll to the top of your page to find the page link. It should look something like this:

- You want to copy the Permalink (which will be different from the one above). The way that I do it is to place my cursor just after the colon, just before the url, and then I hold the left click of my mouse down as I move the cursor to cover the entire url (link). Once I’ve highlighted the entire link, I release the mouse; the link should remain highlighted. Then, making sure that my cursor is hovering over the highlighted area, I right-click on my mouse and select “copy”. Now you are ready to make your links to two parts.
- Below the <p id=”top”>TOP</p> code, add the following:
 Remember: the “permalink” part is the url that you copied for your page! So, for example, using my page’s permalink, my HTML looks like this:
  I didn’t hit the return key, by the way; it just automatically wrapped around to the second line like that. Do not hit the return key or add spaces unless it shows a need for a space!
 - Now you’re ready to create the identifying markers for each part. It’s easier to understand how this works if you put some filler onto your page: I suggest that it be one of the pages for your Website Project, but I am also willing to accept a silly page (see Exercise #2).
- Choose a spot for the Part 1 identifying marker. Type: <p id=”part1″>Part 1</p> (still in Text mode).
- Choose another spot for the Part 2 identifying marker. Type: <p id=”part2″>Part 2</p> (still in Text mode).
- Last thing! You want to provide the opportunity to return to the top. Choose 1-3 spots for this link. Once again, you will need to have your permalink handy. Type:
 at each spot.
 - Now, click on the Visual tab to see how it looks. If it looks alright to you, test it out by clicking on View Page.


